or yay for not sheduled post!
Have you got bored yet of them? I hope not, lol. But here's a crafty post to make it up for it.
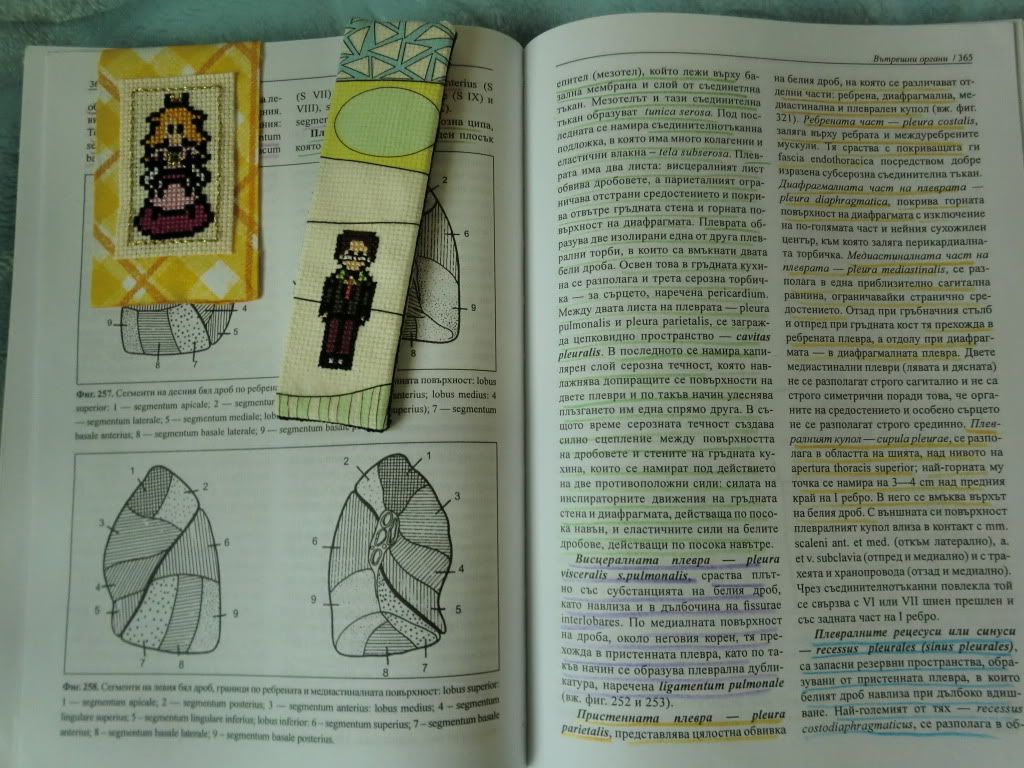
first, I want to show you some bookmarks (yup, MOAR bookmarks, as my second package to the USA was received)
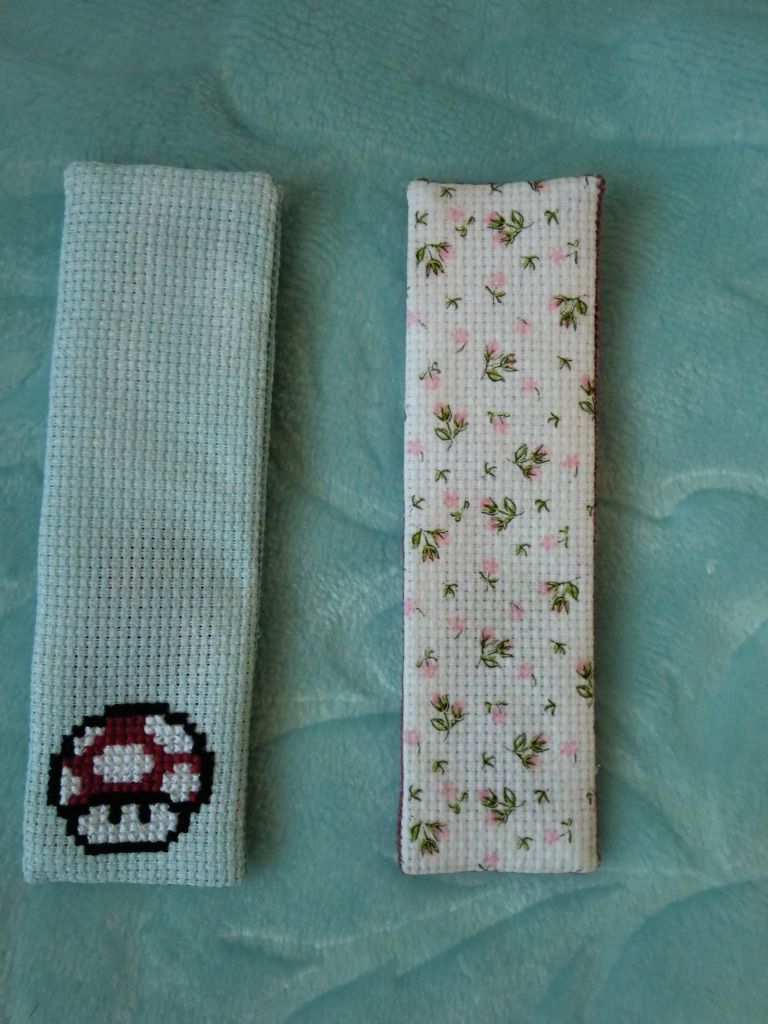
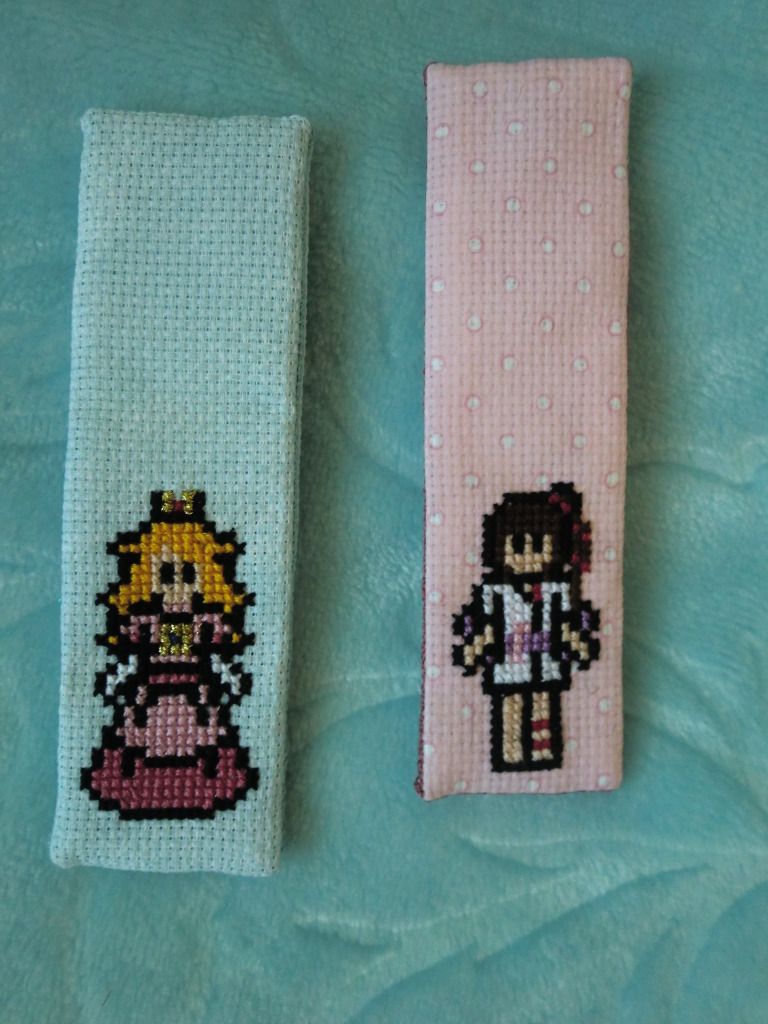
These characters may look familiar to you, as this was a "omg stuff got lost"kind of package and you've already seen them stitched in a slightly different way. Patterns, of course, came from Dork Stitch (where right now you can find the cutest patterns of Sherlock and Watson that I so so so want to stitch!!)
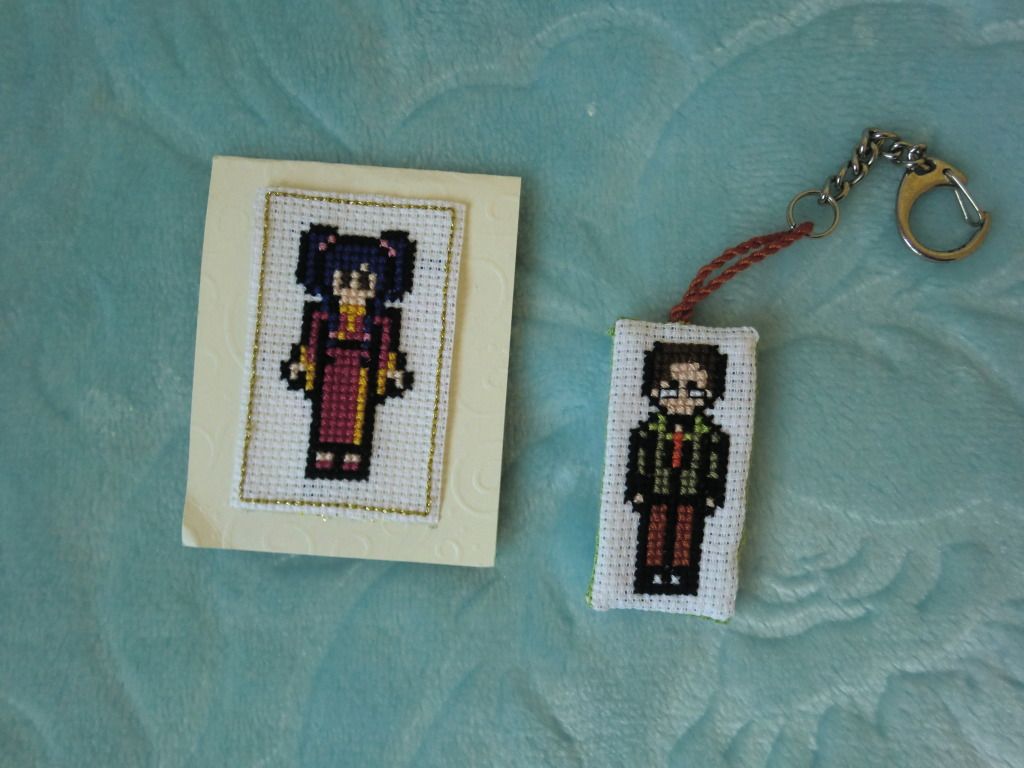
Hum, but anyway, I got some questions on how I made the background like that. Well the answer is : I used decoupage to make the front and the back of the pink Princess Miyu, and also on the first Leonard bookmark:
I don't claim to be the first person to come up with the idea, but I didn't find a tutorial, or even a mention in the Internet, and I mostly went with try and miss kind of way. For this tutorial or something of mine, I just took a couple of photos, because I just don't think there's need for more, and because I really suck at making photos.
Anyway here we go
What we're going to need:

Cross stitch fabric: I used Aida 14 and 16 count. I think 18 will do just fine too, but I personally won't go lower than this
Some pretty serviettes, or paper tissues or I really don't know how is proper to call them in English. I guess you can use paper for decoupage too, but as at least here the sheet of paper is ~2.40 and one serviette is max 0.60 usually cheaper, I haven't tried it.
Brushes, flat or not, but they must be soft, or they will damage the thin paper (really, I tried it)
and most important, the glue

When explaining, I messes things up calling it Textile Medium, because well, this is what's written on the bottle, but it left more than one person thinming it was the fabric that was special. Sorry for that. As you see, this is a kind of glue for decoupage, but instead of hardening after drying, it leaves the fabric soft, slightly gummy, but not unpleasent to touch. It can be ironed and hand washed after it's been treated with it. Mine is from the German brand Marabu, and I'm happy with it, but I guess there are many others to choose from.
Good, we have it all gathered, now what?
First, if you have ever made "classic decoupage" then you can as well proceed the way you're used to, after checking the instructions on your glue, just to be sure. In case you haven't , here is what I do (btw, I'm NOT following the instructions of mine, but hey, it works for me)
1.Choose and cut from the serviette the design you're going to use. It can be a strip for a background, or it can be some fancy figure that you will be trimming further later. I for example have big plans for the princess and the frog serviette up there, including beads and metalics.
2. Peel only the upper layer with the picture. Most serviettes have 3 layers, but some have 4, so be careful, extra layers just get in the way
3. Dampen a piece of the fabric, about 1 cm larger than the design you're using. Sometimes less can do, if that part of the final piece will go under the seam. And by dampen, I mean make it soaling wet with glue. Yup, it will leak through the holes of the aida. Doesn't matter, you want it wet.
4. Now proceed placing you design on the fabric. My glue says to place the whole thing, to press it with fingers and cover with glue just the edges of the design. I wasn't happy with this so that's how I do it:
- starting from the bottom, line the serviette piece with the aida rows
- with the brush with sime glue, start pressing, until you can clearly make out the fabric holes through the paper. But be careful not to damage the serviette while doing so
- proceed slowly up, until you have the whole thing in place.

Something like this:
5. After you're done, let it dry a little, then apply some glue again, paying extra attention to the edges. Repeat untill you're happy.
6. Now let it dry completely and iron it. Check how your glue feels about it, mine says cotton setting on the back side and this time I didn;t argue.
7. Now you have your own very unique piece of fabric! You can leave it like this, if the drawing is fancy, or you can stitch on it. Since I'm doing it on cross stitch fabric, you can guess that this is the main idea after all. The wholes on the aida are not open, but are fully visible and you can easily stitch through the paper. I didn't even have to use a sharper needle than usual, but you can decide that for yourself.
8. Finish your little piece of awesomeness any way you like. For now I've only made bookmark finishes, using biscornu-like stitch to finish it, but there is no limit. I have soo many ideas for this. Like using a square motif to make a biscornu. And the princess froggy thing. You can use a beautiful whole image as a base and then cover it with beads, ribbon embrodiery or special stitches, going for a 3D effect. You don't have to use aida. You can try with bags, totes, t-shirts and other pieces of clothing and embelish them with decoupage and stitching. Haven't tried this yet, but from the shop where I buy most of my crafty stuff there was a bag hanging, embelished like this. In short, if you can think of it, then it most likely can be done.

Here is the back of my finished bookmark, I'm not showing the front until mail does its work (even if I'm itching to do so).
Anyway that's it! It's really very easy and a great way to make yourself a custom piece of fabric, especially when you need it for a small project and don't want to buy a big piece.
It's my first tutorial, so I'm not sure if I covered everything, if not just say :) And if you ever try this, be sure to say so too! As I mentioned, I'm still trying and learning new techniques and uses of this.
Now I'll be leaving you with presheduled posts again *little sigh* but I hope you won't get too bored ;) Again thanks for all the lovely comments and sorry I don't get to answer them all.
I hope you all have and awesome IHSW (cause I envy you, you know XD) Have fun!
~~~~~~
Здравейте, този път с пост, който не е предварително написан за определен ден и час! Надявам се да не са ви омръзнали съвсем книжните постове, но във всеки случай ето един крафтърски за разнообразие.
Пристигна ми и второто пакетче до Щатите, и мога да покажа и тази доза книгоразделители. Героите са същите, само изпълнението е по-различно, тъй като този пакет пратих, когато мислех, че първият се е изгубил.
Но да си дойдем на думата, няколко души ме попитаха как съм направила фона за Леонард от първата пратка, а сега и за розовия книгоразделител с принцеса Мию. Отговорът беше - декупаж на текстил, но тъй като в имейлите успях май само да объркам хората, обещах да постна по-подробно.
Та от какво имаме нужда -
от плат - аз ползвах Аида 14 и 16, 18 сигурно също ще свърши работа, но аз лично няма да слизам на по-ситно
книжни салфетки с хубави десени - пълна свобода на действие. Каквото ви хареса. Сигурно може и специална хартия за декупаж да се ползва, ама тя е много по-скъпа от салфетките ^^""
Мекичка четка, може плоска или не, но да е наистина мека. Ако не е, рискувате да разкъсате салфетката. Личен опит.
И най-важното, специалното лепило.
Това което аз ползвам, е на фирма Марабу и на него пише "textil medium", както го виждате горе. За разлика от обикновеното лепило за декупаж, което си е на практика лак, това оставя плата и хартията меки, с леко гумирано усещане, но не неприятно. Може да се глади откъм гърба и да се пере на ръка с меки препарати.
Може да има и други марки, с различни изисквания, така че никога е е излишно да погледнете инструкциите. Бтв аз моите ги гледам, но като цяло съвсем умишлено не ги следвам, и пак става.
Да кажа, ако сте си играли с обикновен декупаж преди, това наистина е същото. Действайте както си знаете, просто сменете лака с текстилния му вариант. Ако не сте го правили преди, ето аз как действам:
1. Най напред си харесайте дизайна и го изрежете. Може да бъде лента за фон или някакъв по-централен детайл
2. Отлепете само най-горния слой. Повечето салфетки за трипластови, но се оглеждайте за дву- или четирипластови. Излишен слой само ще пречи.
3. Намокрете хубаво с лепилото плат около 1 см повече от дизайна. Може и по-малко, особено ако в крайна сметка този ръб ще отиде под шев, където има по-малка вероятност да се разнищи. Но наистина имам предвид намокрете. Не навлажнете. Да подгизне направо. Тъй като дупките на Аидата са големички, сигурно ще протече през тях малко лепило. Нищо. Наистина искате основата хубаво да е поела лепилото.
4. Разположете дизайна на намокрения с лепило плат. Листовката на моето лепило казва да го притиснете с пръсти и после да намажете с лепило само краищата. Аз с това не се съгласих, и вместо това
- отдолу - нагоре - подравнявам долния ръб на дизайна с един от редовете на аидата, притискам с пръсти около първите два сантиметра, после минавам върху тях с четката с лепило, като натискам хубаво, но внимателно, докато дупките на плата не се различават добре. После малко по малко продължавам нагоре, докато цялото парче салфетка не е залепено.
5. Оставете малко да изсъхне, и повторете пак, като обръщате внимание на ръбовете. Повтаряйте тези стъпки, докато не сте доволни от това как е залепнало, или докато не ви свърши лепилото.
6. Сега вече оставете няколко часа да изсъхне напълно, после изгладете от опаковата страна, ютията на "памук"
Вече си имате персонифицирано парченце плат! Може да си го оставите така, ако е с някаква супер готина картинка, или да го използвате за фон и да избродирате нещо отгоре. По-скоро второто, иначе нямаше да го правим на аида, нали :) Въпреки че са запушени от салфетката, дупките на плата се виждат съвсем ясно и не би трябвало да имате проблем да ги улучите. Салфетката също така е съвсем тънка, и аз дори нямах нужда да сменя иглата за бродиране с такава с остър връх докато шиех, но това вече е въпрос на предпочитание.
Като свършите бродирането, завършете както ви душа иска. По стечение на обстоятелствата, досега залагах само на книгоразделители, но имам още много идеи и планове. Като да речем за онази салфетка с принцесата и жабока. Или да използвам квадратен дизайн за бискорню. Може да се ползва цяла салфетка с красива картина за основа, която после да се покрие с мъниста, панделки или специални бодове в търсене на 3D ефект. Или може да се украси някоя платнена чанта или тениска. Това не съм го опитвала, но в магазина, откъдето си вземам повечето материали имаше такава платнена чанта изложена. Накратко, ако може да се сетите за нещо, то най-вероятно може и да се направи.
За пръв път така сядам да обяснявам нещо как се прави, обикновено съм от тези, които четат :)) така че е много вероятно да не съм обяснила като хората. Ако има нещо, кажете, а ако опитате тази идея на практика, още повече кажете! :D Приемам идеи всякакви.
Та засега това е. Ще ви оставям пак с насрочените публикации за книжки :) Иначе приятна неделя на всички!